VSCode extension overview
Although jxscout can be used without the VSCode extension, it brings many features that make navigation through your target's code a much easier task.
In this tutorial we will explore the different navigation capabilities of the jxscout VSCode extension and how you can use it to optimize your work.
Overview
Let's start by taking a glance at the views that the VSCode extension offers and summarize their purpose.
- Matches — shows pieces of interesting source code extracted by jxscout. Use it to navigate to the location in the code where that information was extracted.
- Static assets sitemap — shows all assets tracked by the project in a convenient, filterable structure.
- Relationships — shows assets related to the file currently open in the editor (e.g. referenced JS files, iframes, etc.)
- Search — offers filtering options for both the Matches and Static assets sitemap views.
- Instances — lets you add jxscout instances and quickly connect to or disconnect from them.
- Findings — shown at the bottom; it displays jxscout findings. We will explore findings in a later tutorial. With the default configuration, this view typically shows nothing.
Setting up the lab
To explore the VSCode extension capabilities, create a new project vscode-extension-overview and set the scope to *labs.jxscout.app*.
Open the https://labs.jxscout.app/labs/noisy-navigation/ lab in your browser. To make it easier to follow the tutorial, don't interact with the page elements for now.
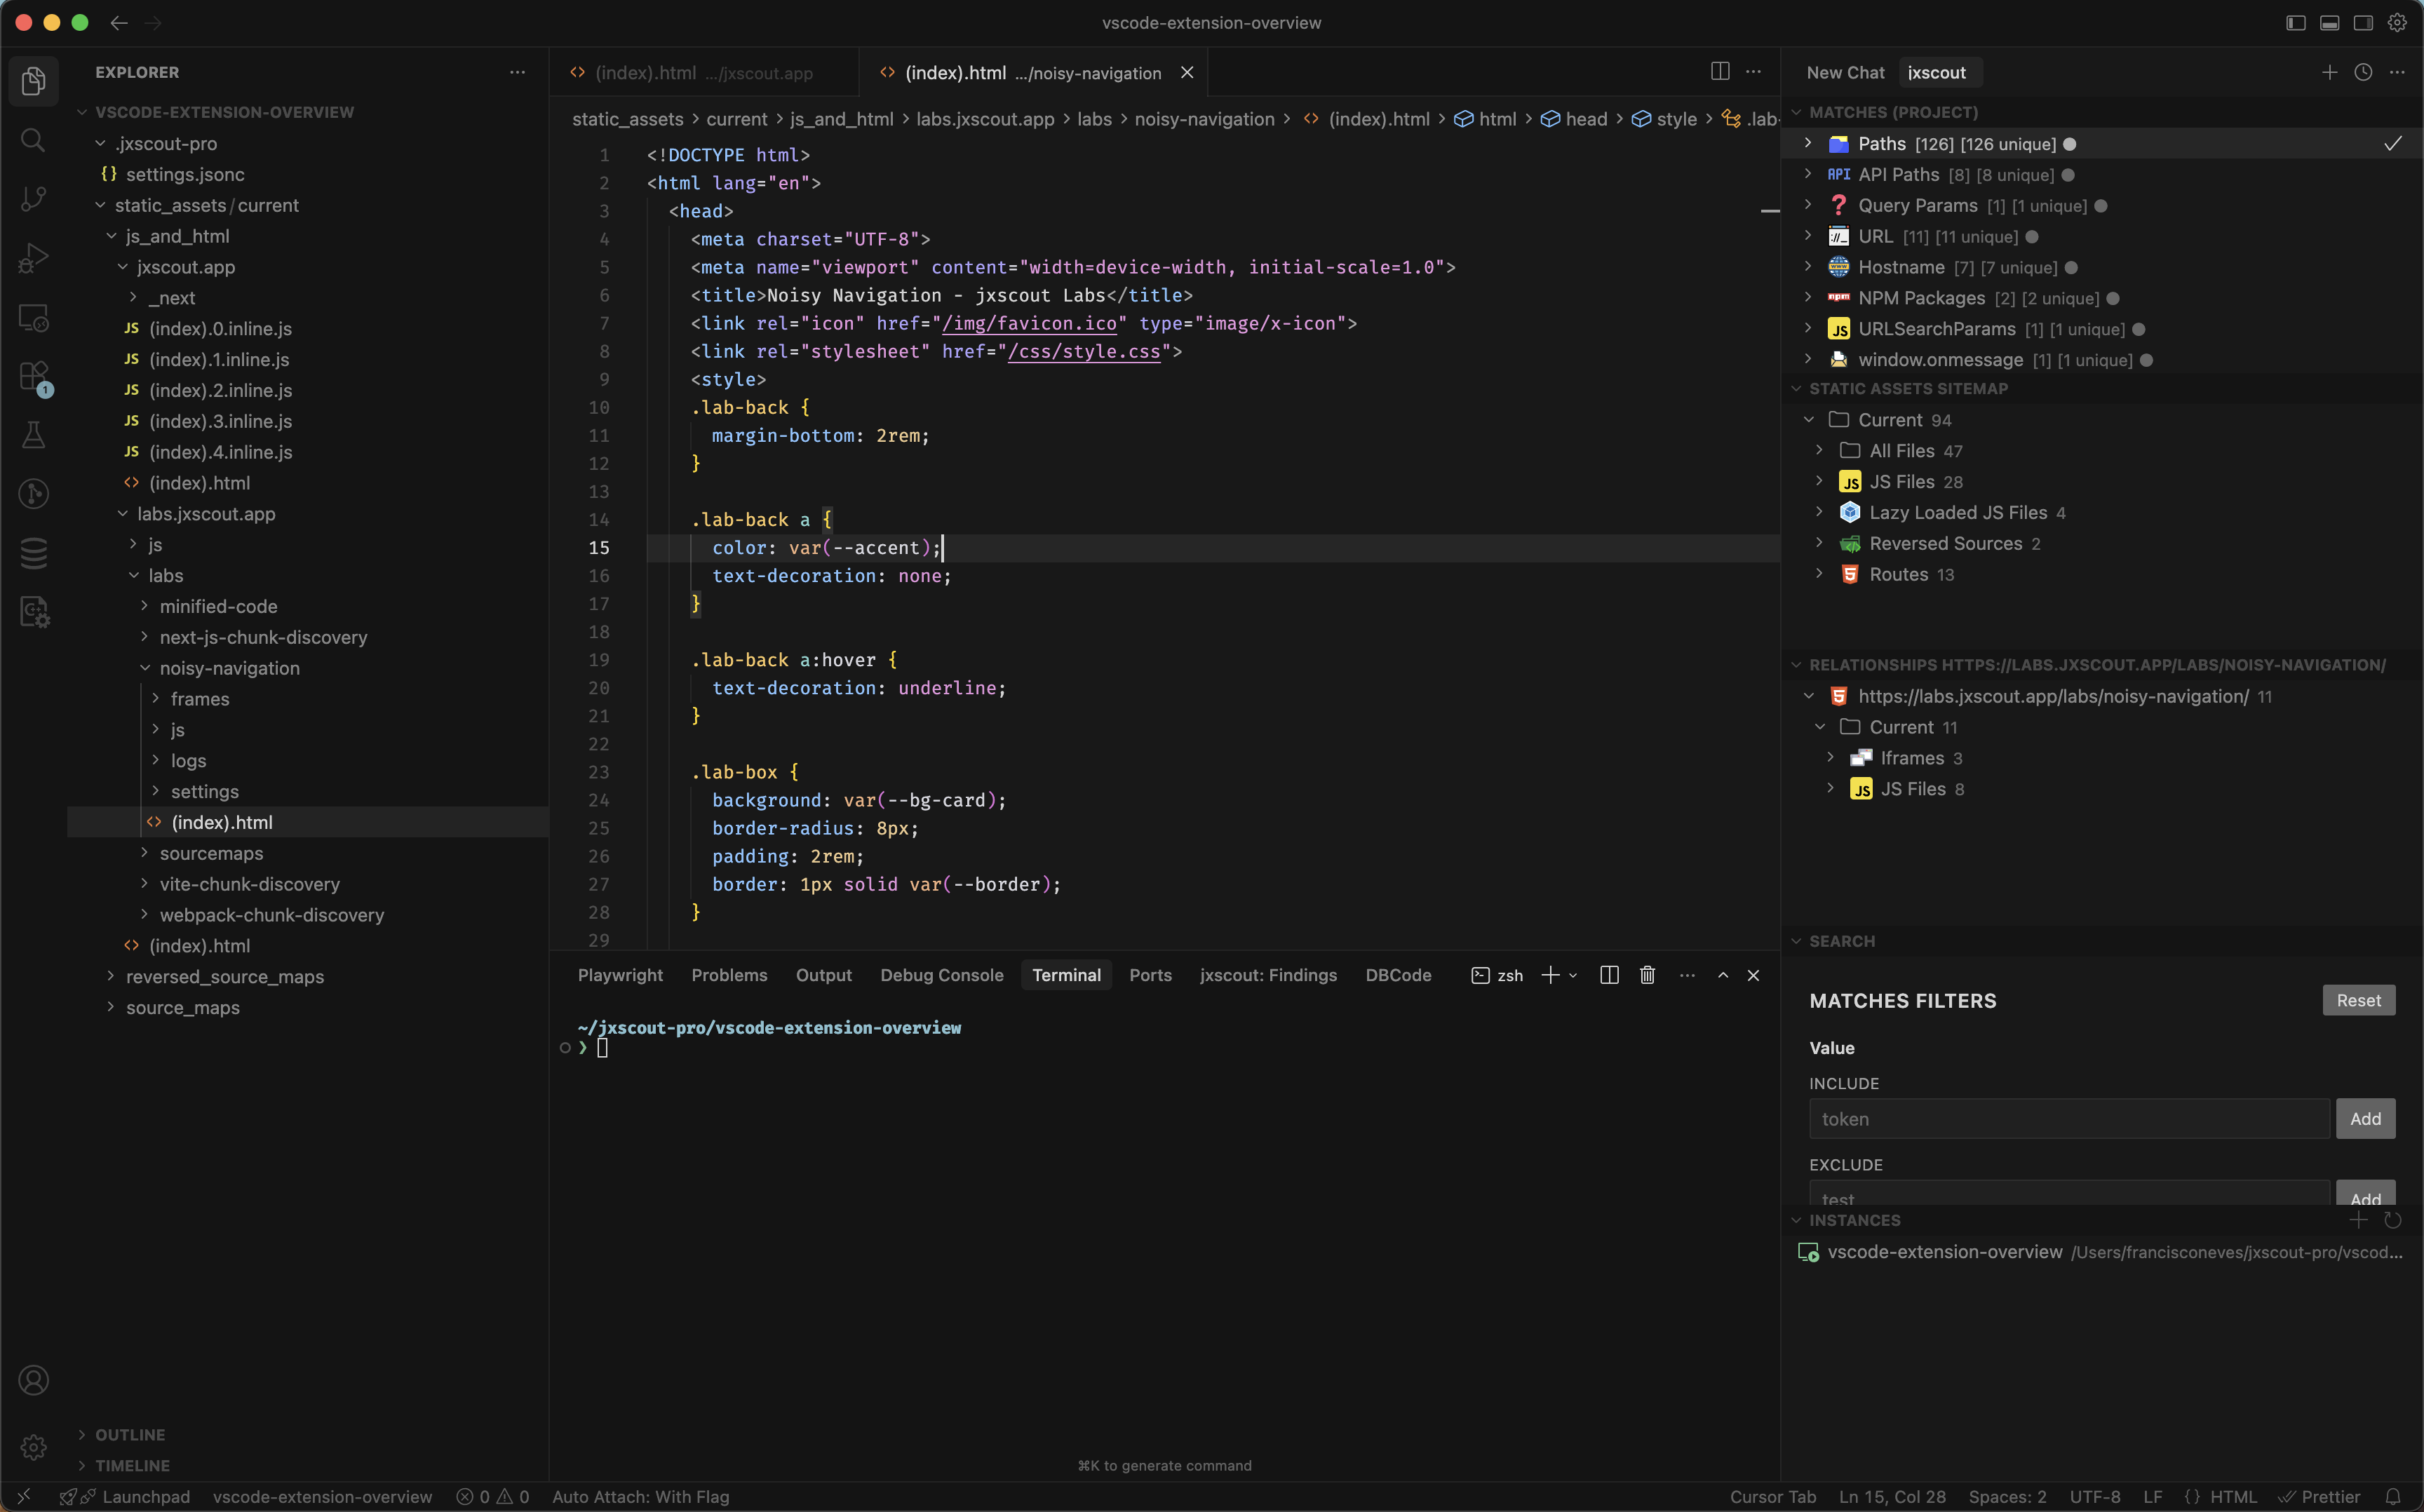
Matches view
The Matches view shows interesting pieces of information extracted from source code by jxscout.
As soon as you open the lab, you will see that jxscout already identified some interesting things for you.
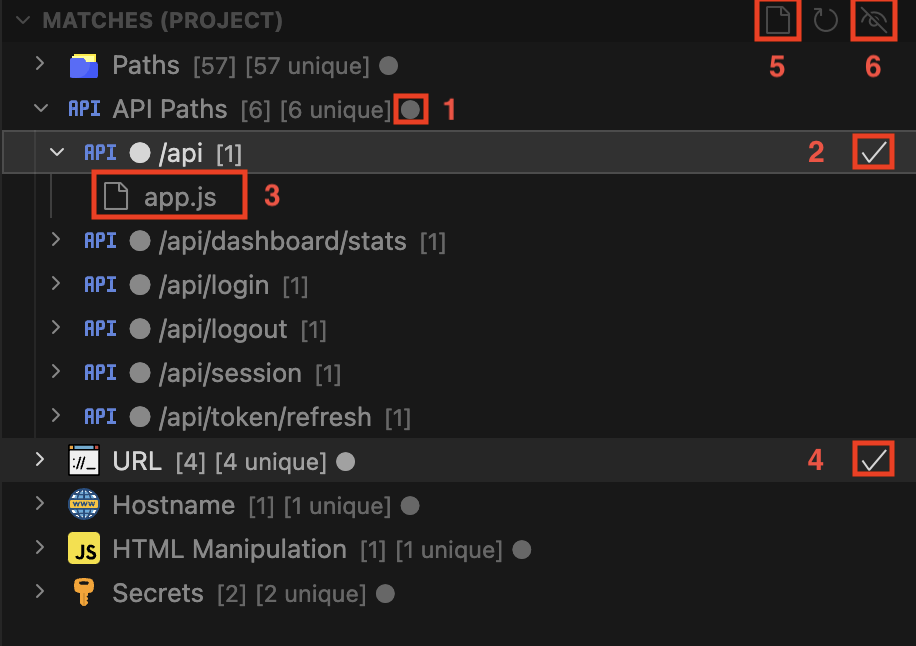
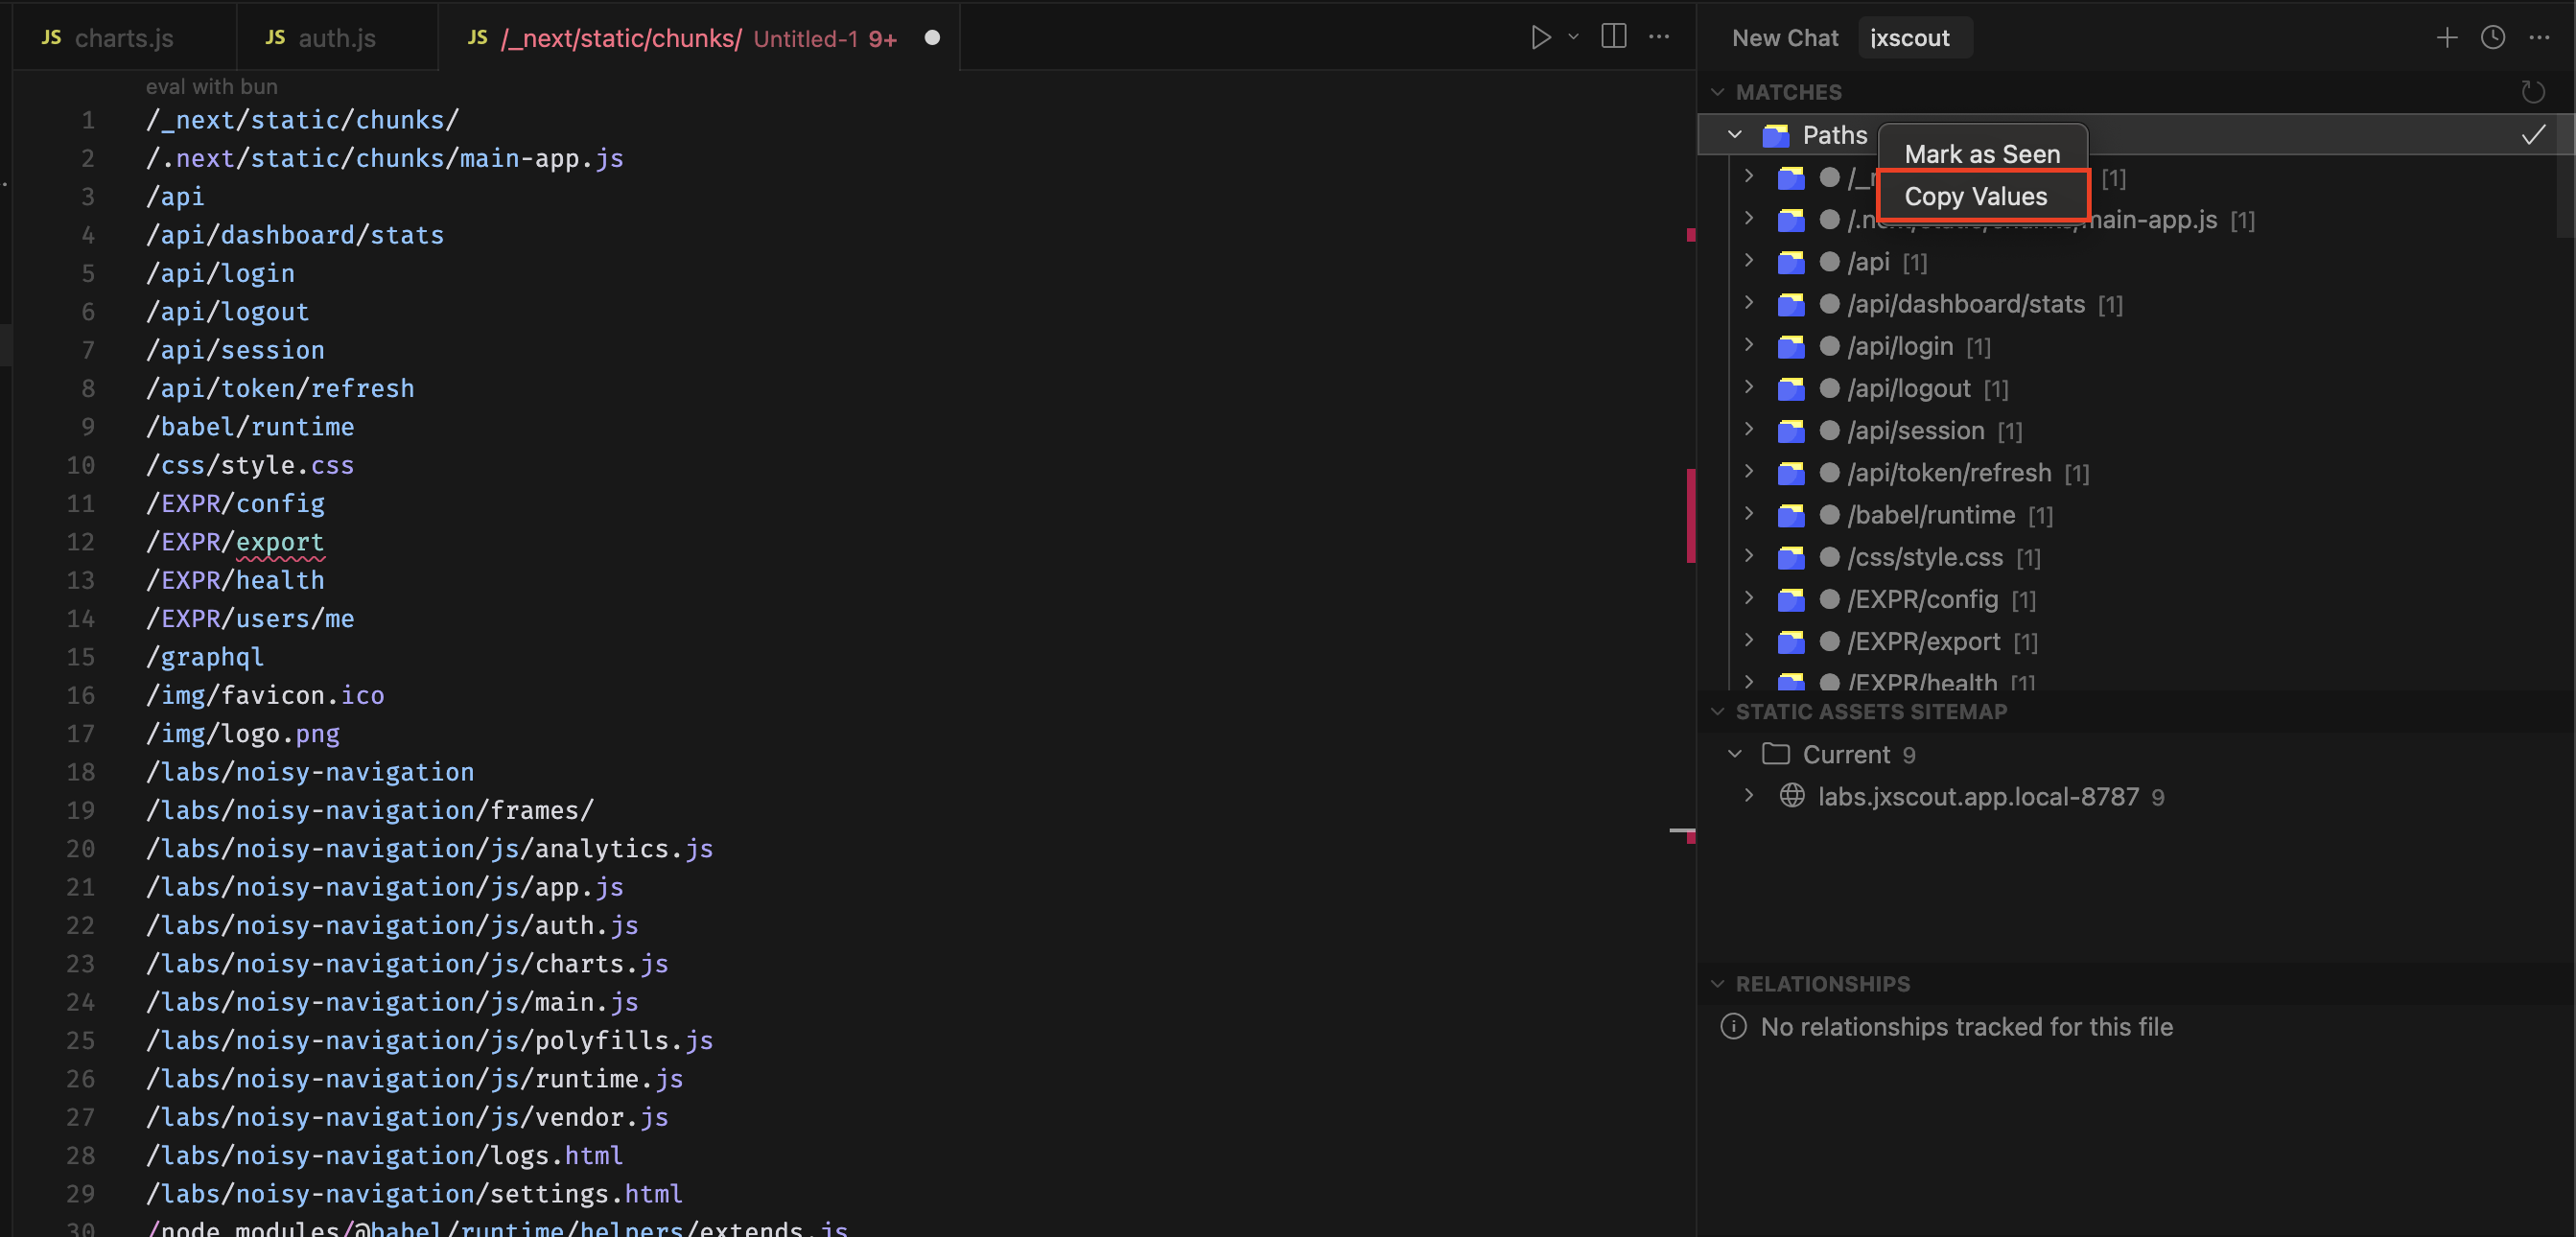
The main goal of the Matches view is to let you quickly jump between pieces of relevant source code. Click on some of the matches and see how VSCode jumps to the place in the source code where that match was extracted. If you expand an individual match, you will see the filename where the match was found (3). If you hover over the filename, you will see a tooltip with the full path to the file.
The Matches view also has some other interesting functionalities.
Unseen matches
jxscout keeps track of unseen matches. This lets you interact with your target, then come back to VSCode and see what new matches jxscout identified. The circle labeled with 1 in the image above signals that there are new matches you haven't checked yet. Unseen matches show those circles, and so do their parent navigation nodes when any descendant is unseen.
When you click a match or press the tick symbol labeled with 2, jxscout marks that match as seen, making the 1 circle disappear. You probably noticed this when you were clicking on matches earlier.
You can also click on the tick symbol on a navigation node to mark all descendants as seen (4).
It's common for you to jump around and take a quick look at the new matches identified by jxscout, but sometimes you don't want to break your flow and come back later to matches that you had already marked as seen. You can do that by right-clicking on one or multiple matches, and selecting "Mark as unseen".
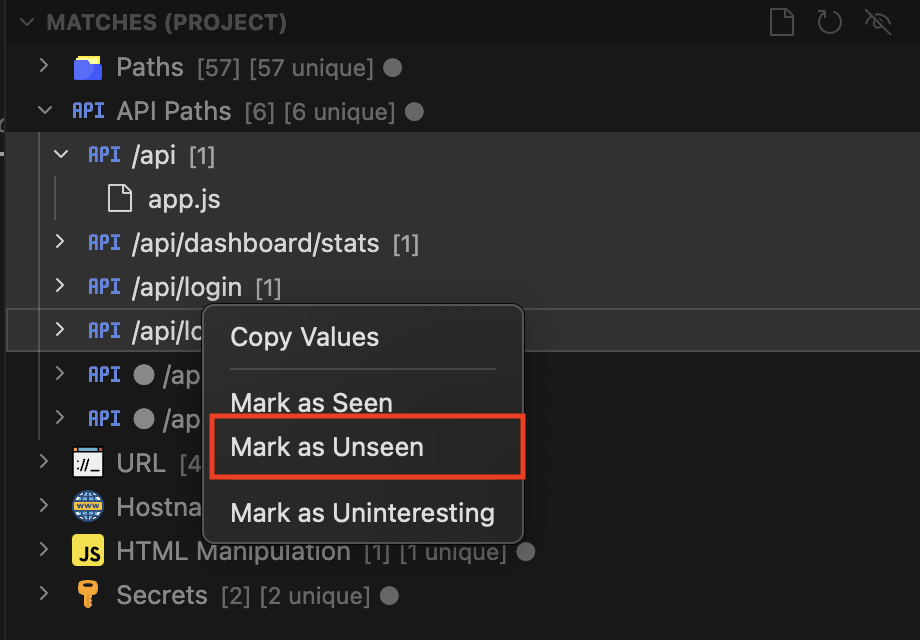
You can also mark all child matches of a navigation node as unseen by right-clicking on it and selecting "Mark as unseen".
Uninteresting matches
jxscout attempts to find as much data as possible, and even though it has some built-in rules to ignore some common noisy data, targets are really diverse and it's hard to implement rules that work on all of them without risking filtering out data that would really be important.
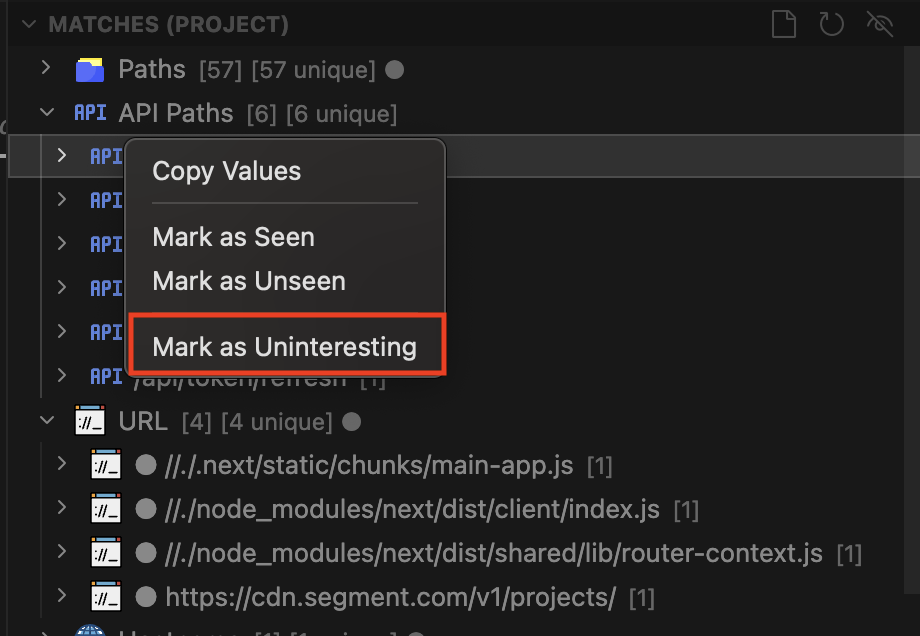
To help you unclutter your Matches view, jxscout has this concept of "uninteresting matches". Basically these are values that you manually reviewed and don't think are relevant to show in your view.
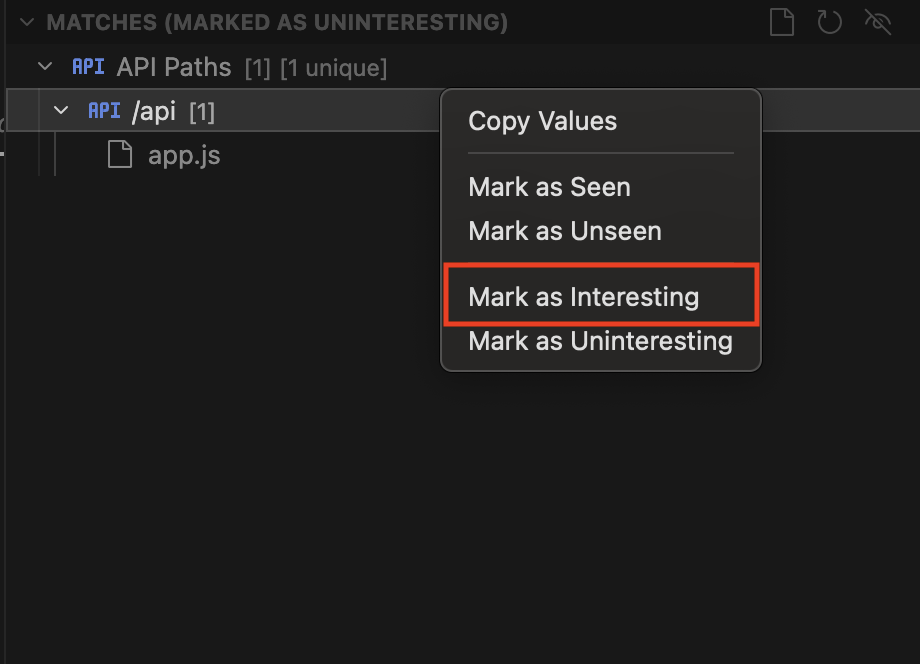
To mark an item or multiple items as uninteresting, just select them, right-click and select "Mark as uninteresting". After you do that you'll notice the match will no longer be shown in your view.
If you set a match as uninteresting by mistake, you can use the button labeled 6 in the section above that gave an overview of "Matches", to see only uninteresting matches. There you can set matches back to being "interesting".
Regarding filtering noise in a more permanent way, one idea is to take the values that you "mark as uninteresting" and create a preprocess_script that filters out some common noise values.
Project view/File view
By default, the Matches view will show all the project matches. However, you might want to see matches for individual files if you are reading them. You can use the button labeled as 5 on the Matches view overview image to change to the "File view".
In file view, jxscout will load matches for the file that you currently have focused. As you focus other files, new matches will be loaded.
You can go back to the project view by clicking the same button.
Copying values
The Matches view also lets you copy values. One use case is to take the paths identified by jxscout and use them for brute-forcing to uncover new endpoints on your target.
To copy values, right-click on the Matches view and choose "Copy Values". You can:
- click navigation nodes to copy the values of all descendants;
- click individual matches to copy their value;
- hold Shift, right-click to select multiple nodes, then copy their values.
Static Assets Sitemap view
The Static Assets Sitemap view gives you an overview of assets tracked by jxscout. Right-click on the sitemap to see the options:
- Copy URLs — copies the URLs of the selected nodes. It works recursively: selecting a navigation node copies all URLs under that node.
- Copy File Paths — copies the file paths of the selected nodes. It works recursively: selecting a navigation node copies all file paths under that node.
- Search in files — fills the "files to include" field in VSCode's search so you can search only within the selected files.
Filtering options for matches are covered later in the Filtering matches section.
Relationships view
To better understand the Relationships view, open https://labs.jxscout.app.local:8787/labs/noisy-navigation/ and click the three buttons to load the iframes.
If you previously marked all matches as seen, you will see how the unseen matches symbol helps you identify newly found matches.
Then open the static_assets/current/js_and_html/labs.jxscout.app/labs/noisy-navigation/(index).html file in VSCode.
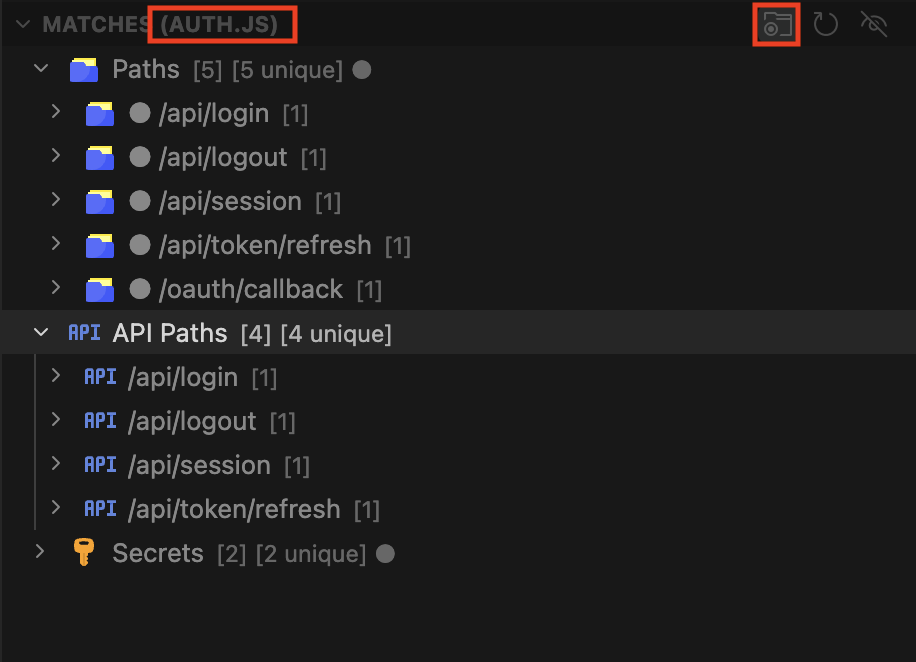
When you open that file, the Relationships view reloads. By default it shows assets related to the file currently focused in VSCode. You can lock the view (e.g. to navigate through files related to a particular route) by clicking the lock icon marked with 1 in the image below.
The jxscout Chrome extension's main purpose is to power this view. With the browser extension, jxscout can reliably track:
- Iframe relationships between pages
- JS file loader relationships — which pages load a particular JS file
- Lazy-loaded JS file relationships — which pages load lazy-loaded JS files

Right-clicking on this view shows the same commands as in the Static Assets Sitemap view. This is useful when you want to perform searches or view matches only within JS files loaded by a particular route—often quicker than searching in Chrome, which can be slow.
Instances view
The Instances view lets you manage connections to different jxscout instances. This is useful when you have multiple instances open and want to switch between them quickly. Add an instance by clicking the + icon marked with 1 in the image below.

Filtering matches
By default the Matches view shows all matches across your project. However, as your project grows, going through all matches can become unmanageable and you may want to drill down. The VSCode extension includes useful built-in filtering for this.
The Search view offers the following filtering options for matches:
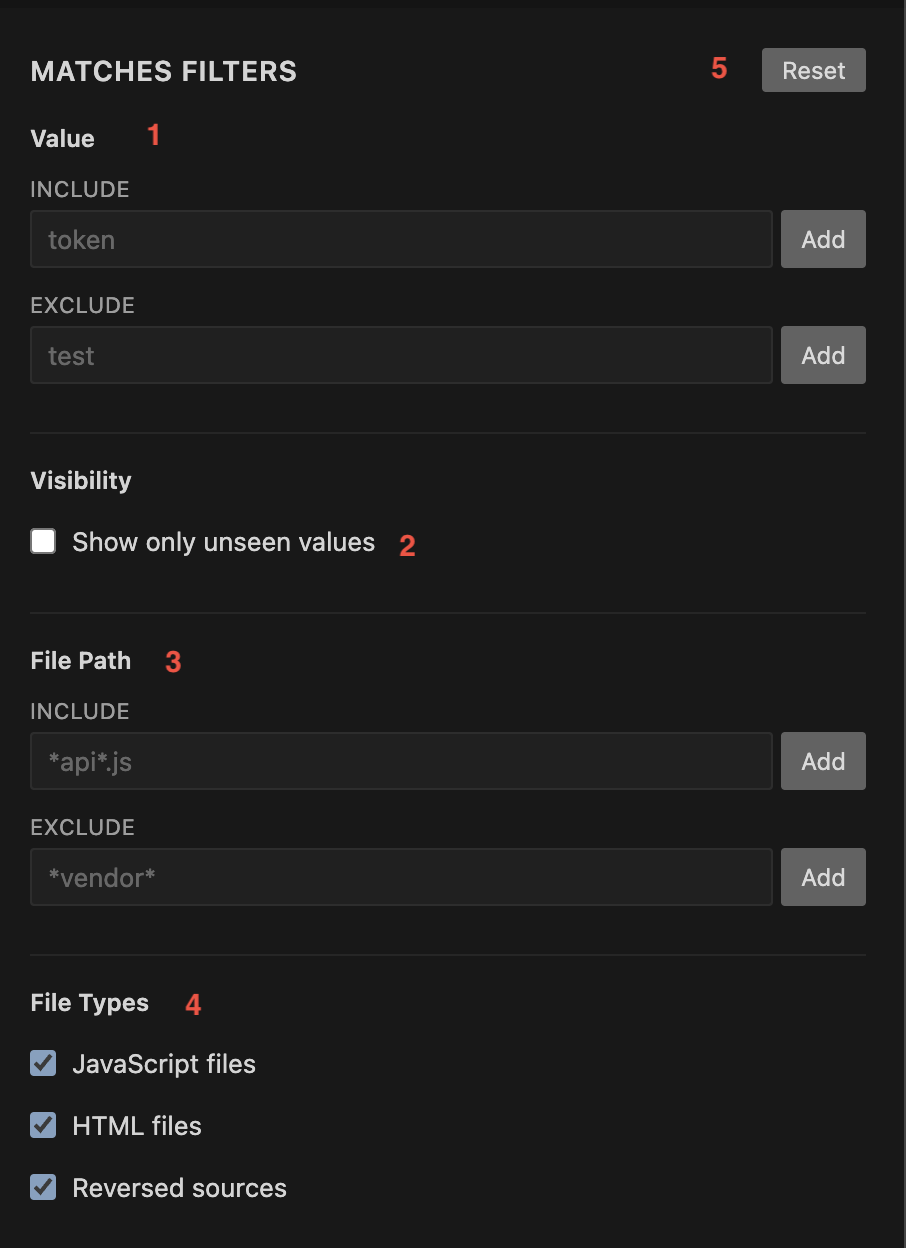
- Value (
1) — include or exclude matches matching the input. Gets all values that include your search criteria. - Show only unseen values (
2) — show only unseen matches. - File Path (
3) — include or exclude matches in file paths matching the input. Uses exact match and supports wildcards. - File Types (
4) — restrict matches to specific file types.
You can use the Reset button (5) to reset the search filters to their default state.
There are a few shortcuts to speed up setting up some of these filters.
On the Sitemap, Relationships view, or native VSCode file explorer, right-click folders or files to see these options:
- Filter Matches: Include/Exclude All File Paths — recursively copies file paths and adds them to the "File Path" filter.
- Filter Matches: Include/Exclude Path Glob — creates a wildcard filter for the selected path and adds it to the "File Path" filter.
When filtering for paths, you the Static Assets Sitemap view will update to show which assets are included in the filter.
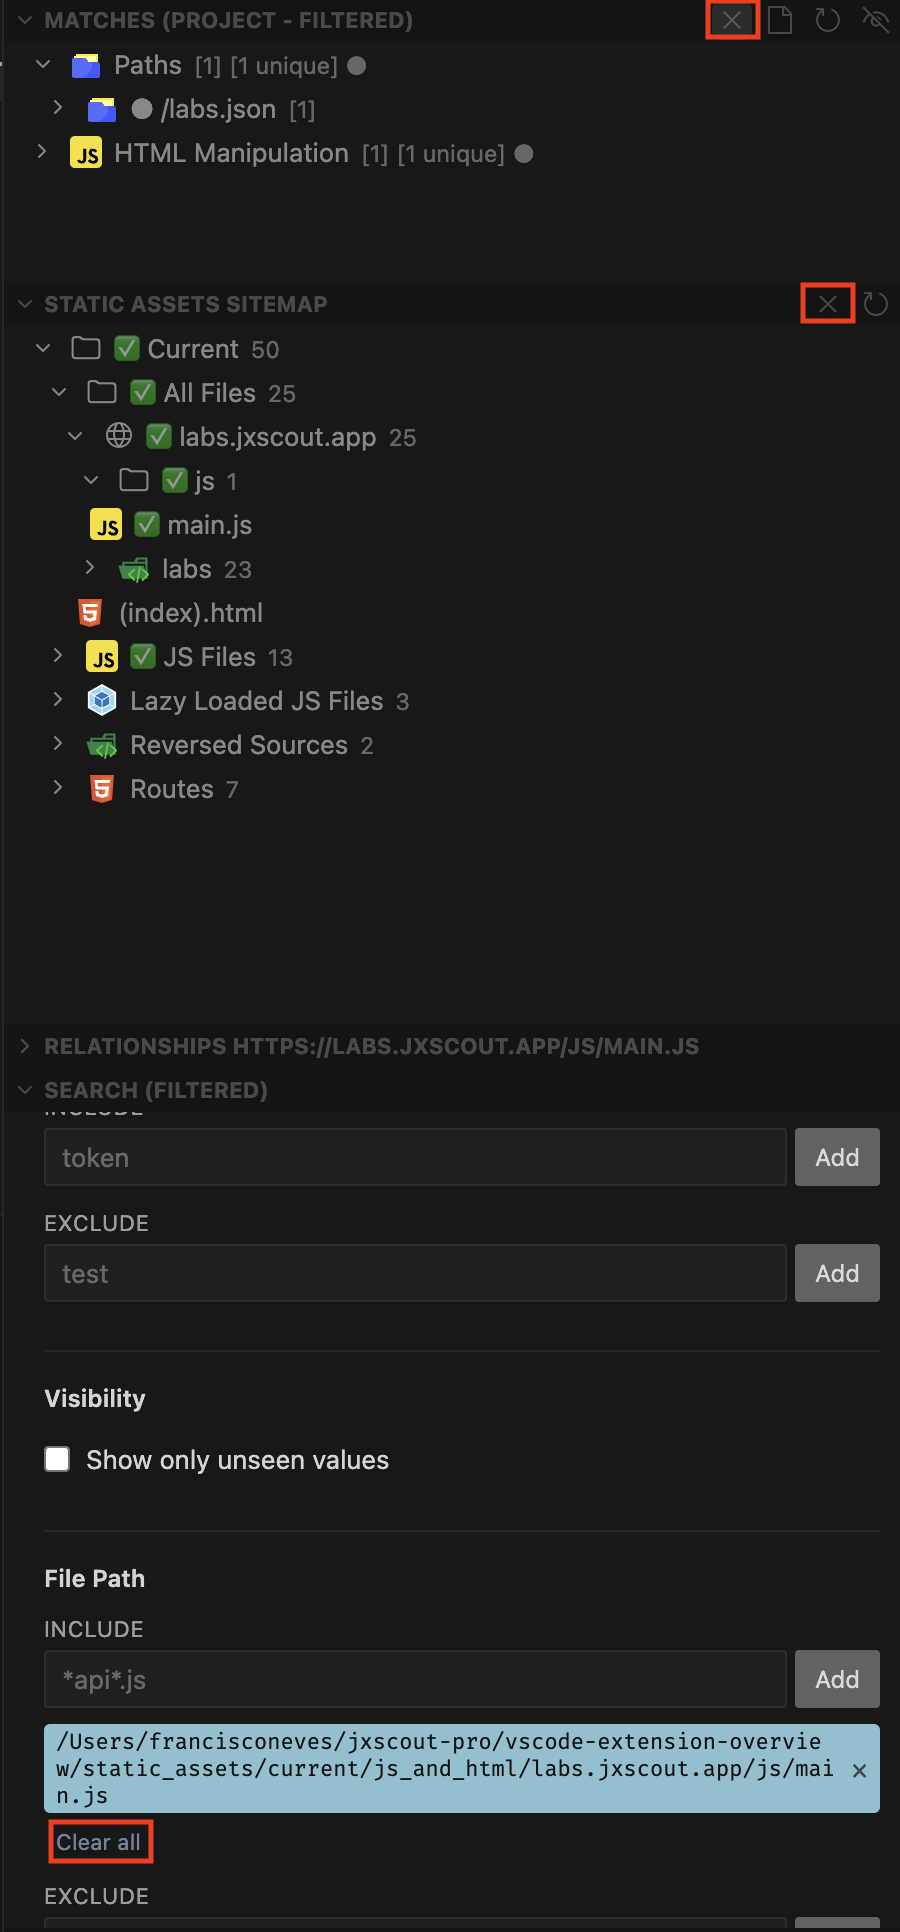
You can also quickly clear filters in a few ways highlighted in the image below.
Feel free to use the lab to play around with the different filters and see how you can use them in your workflows.
Filtering assets
The VSCode extension also offers many ways to filter assets. This feature works together with the match filters to run more targeted queries.
For example, you can:
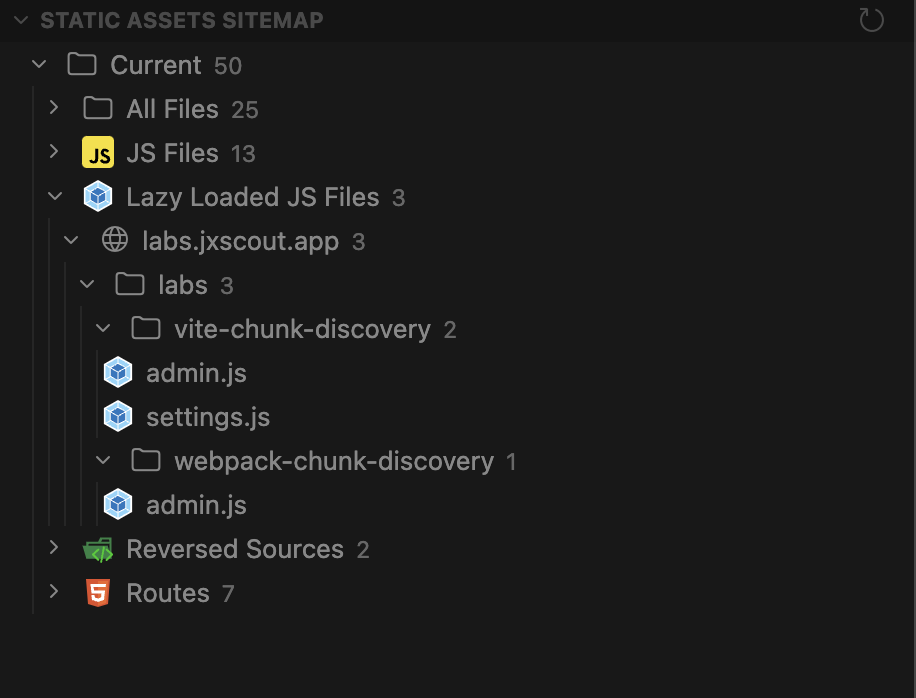
- Filter the sitemap to only show lazy-loaded JS files
- Right-click the root node of the Static Assets Sitemap view
- Select "Filter Matches: Include File Paths"
You can then view matches found only in lazy-loaded JS files.
The Search view offers the following filter options for the sitemap:

- Search (
1) — fuzzy search for files in the sitemap. - File Types (
2) — restrict to specific file types. - JavaScript (
3) — show all JS files, only lazy-loaded JS files, or exclude lazy-loaded. - HTML (
4) — show all HTML files, only pages in iframes, or exclude iframes. - History (
5) — show or hide history files in the sitemap. History is covered in a later section.
You can use the Reset button (6) to reset the search filters to their default state.
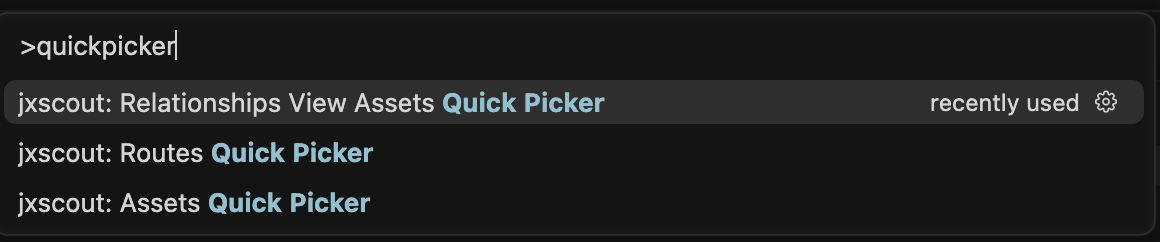
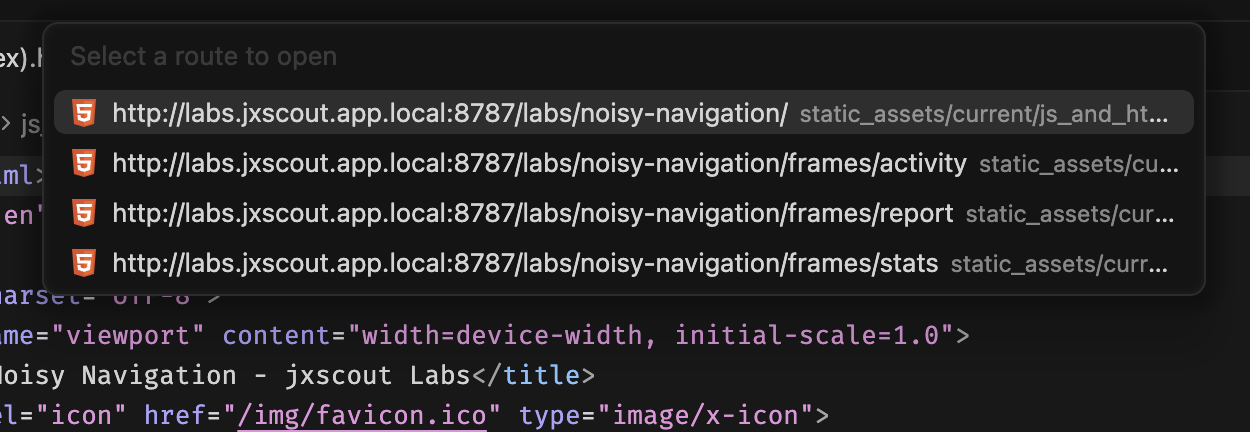
Quick pickers
To help you navigate through assets, the VSCode extension also provides three quick pickers. To use them, open the Command Palette in VSCode (Ctrl+Shift+P) and search for jxscout: Quick Picker.
Bookmarks
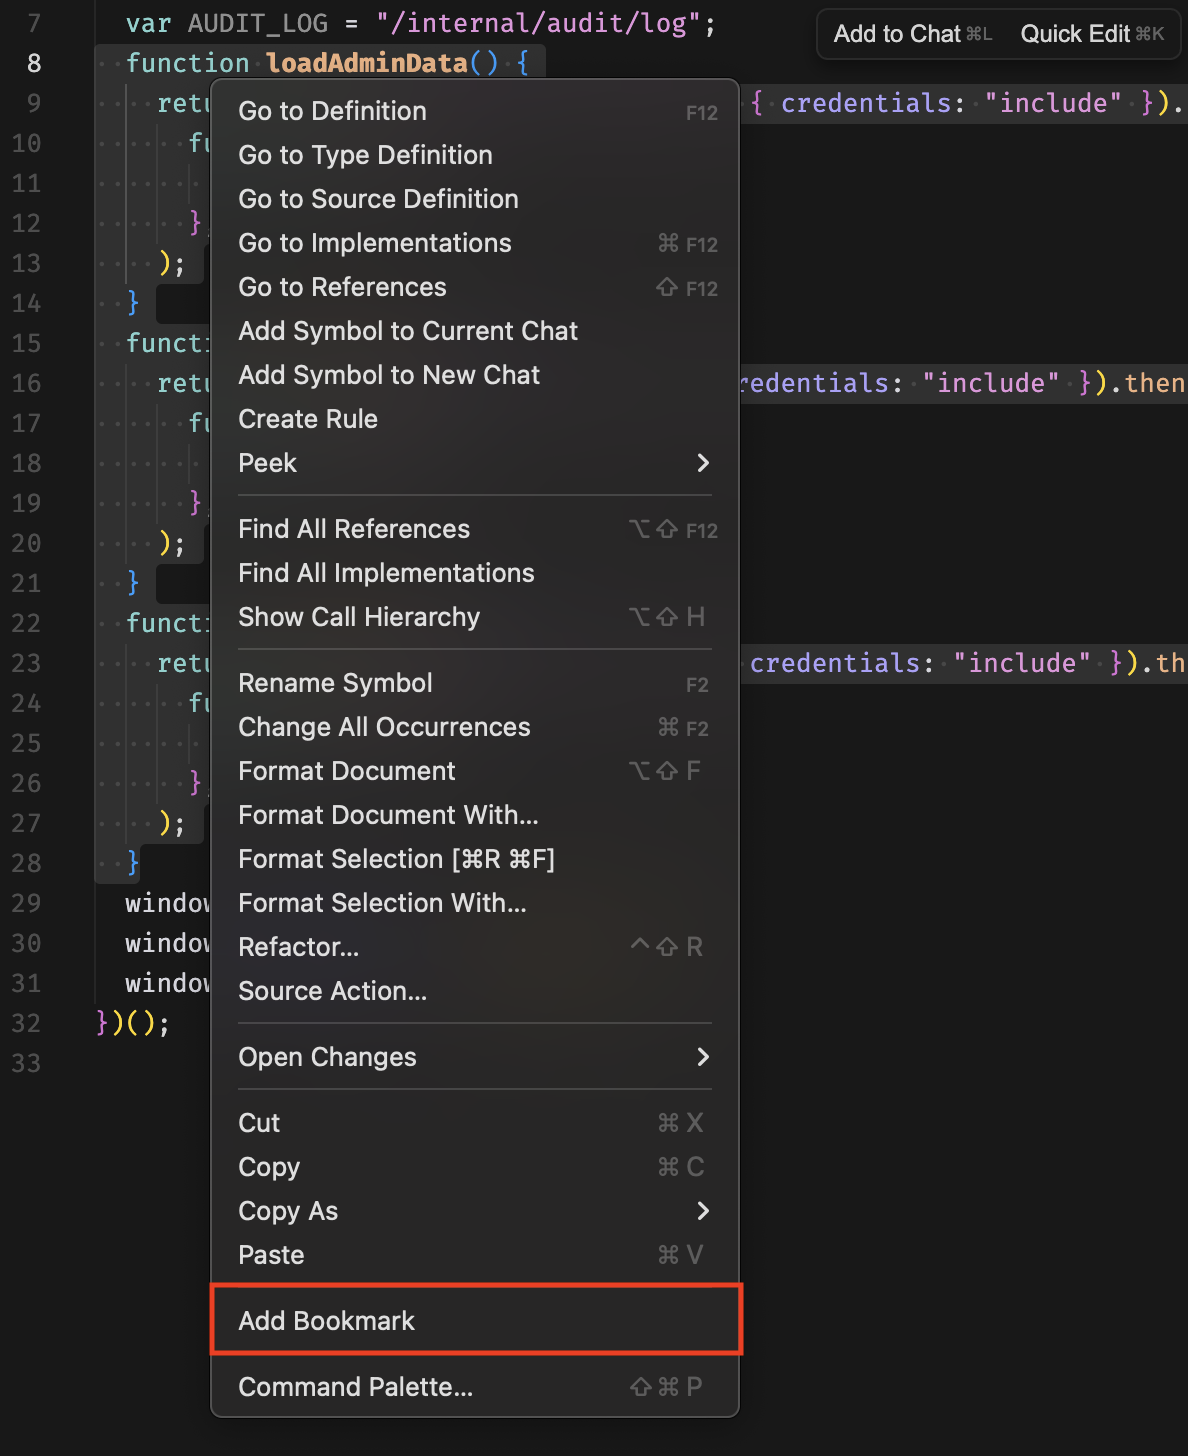
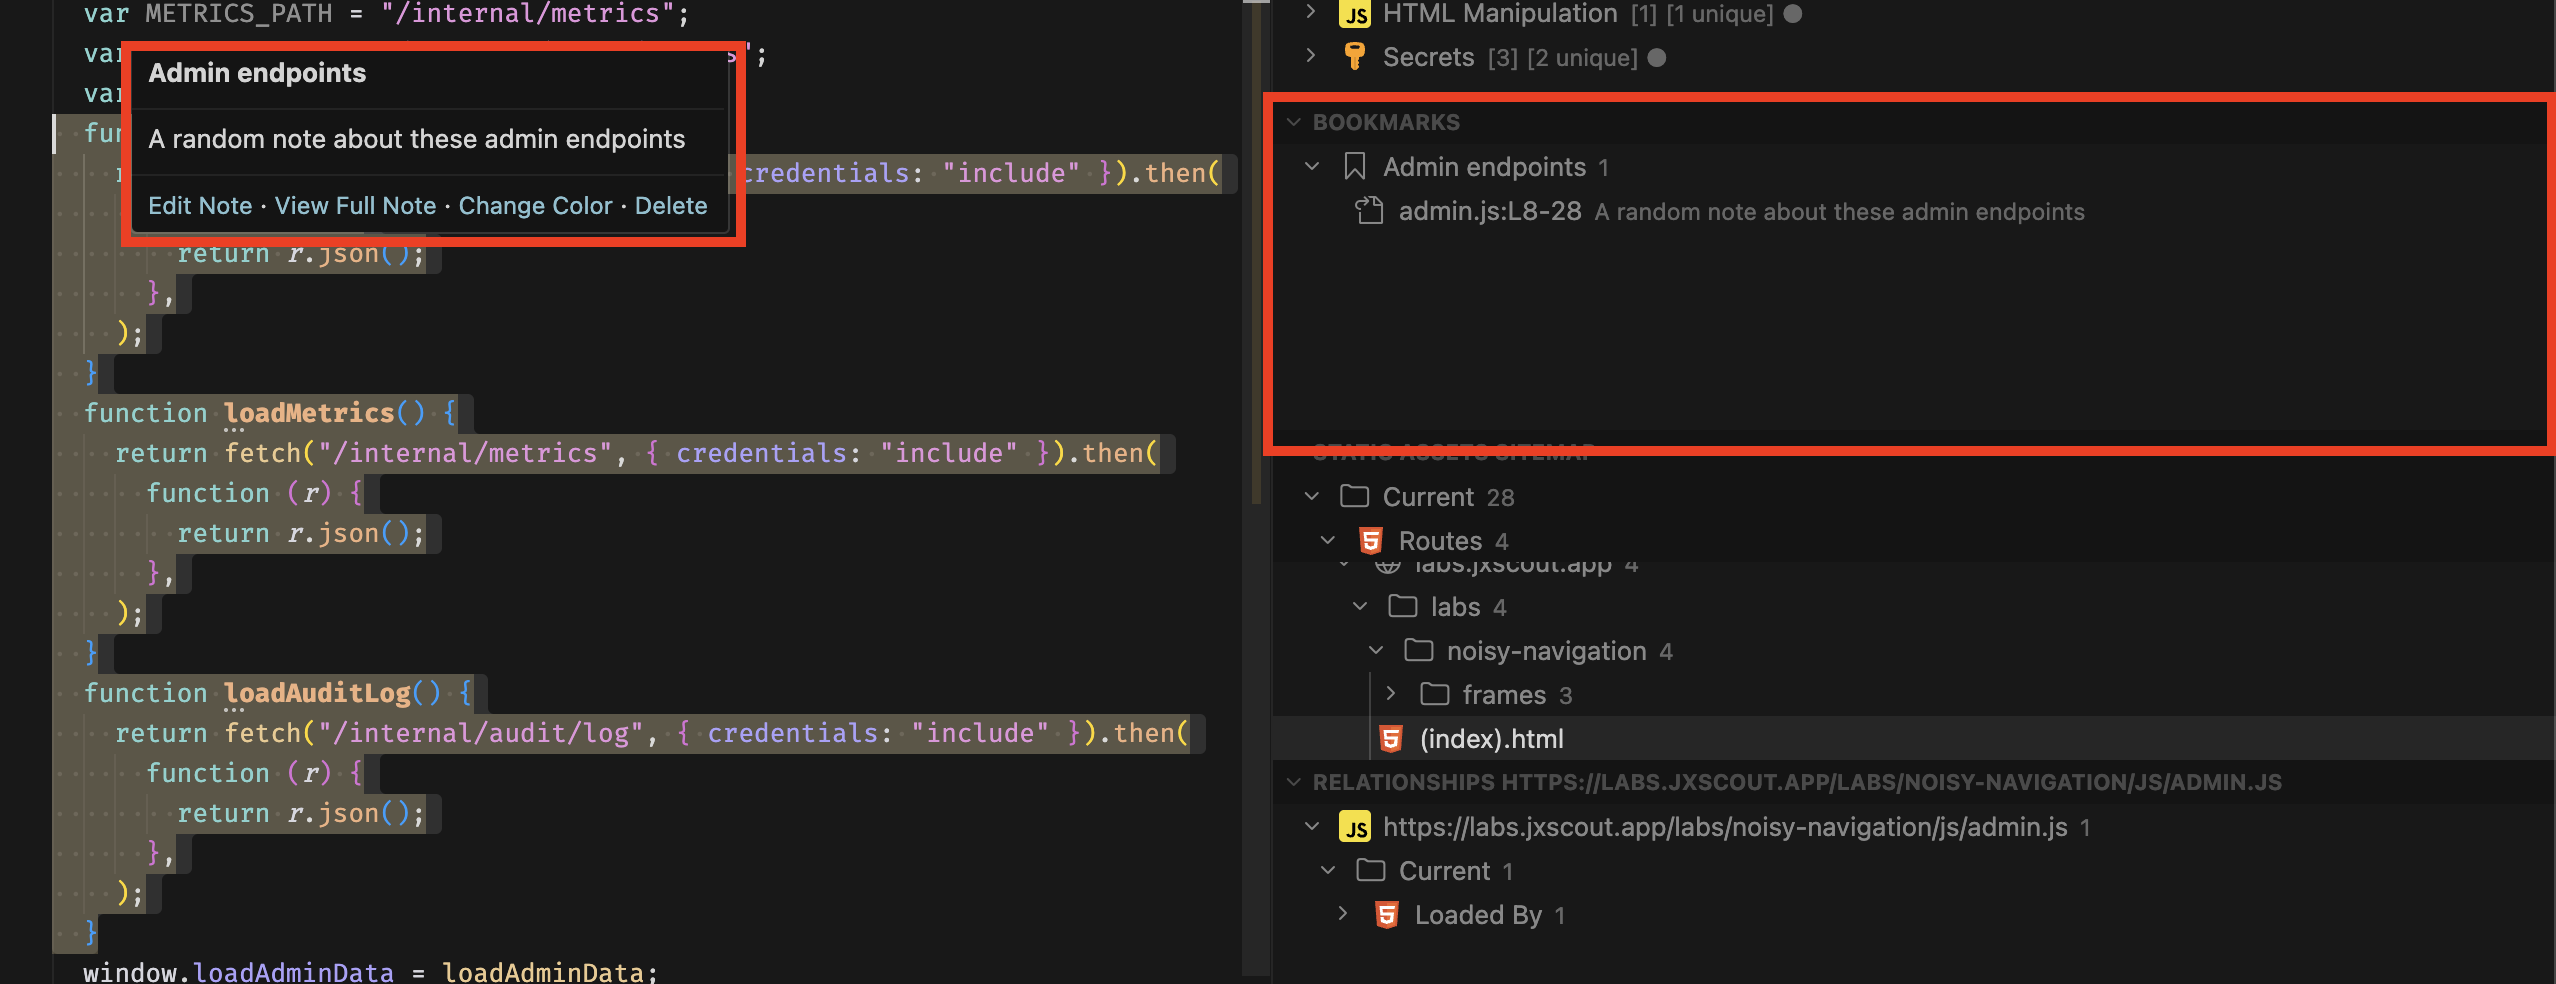
While you are exploring your target's code, you will find useful gadgets and things that you want to save as reference. To help you with this, jxscout allows you to create arbitrary bookmarks. Agents can also use the bookmarks skill to create bookmarks using the jxscout CLI.
To create a bookmark, highlight a piece of code and right-click in VSCode. Then select the "Add bookmark" option. This will prompt you to create a new bookmark group, or add the bookmark to an existing group.
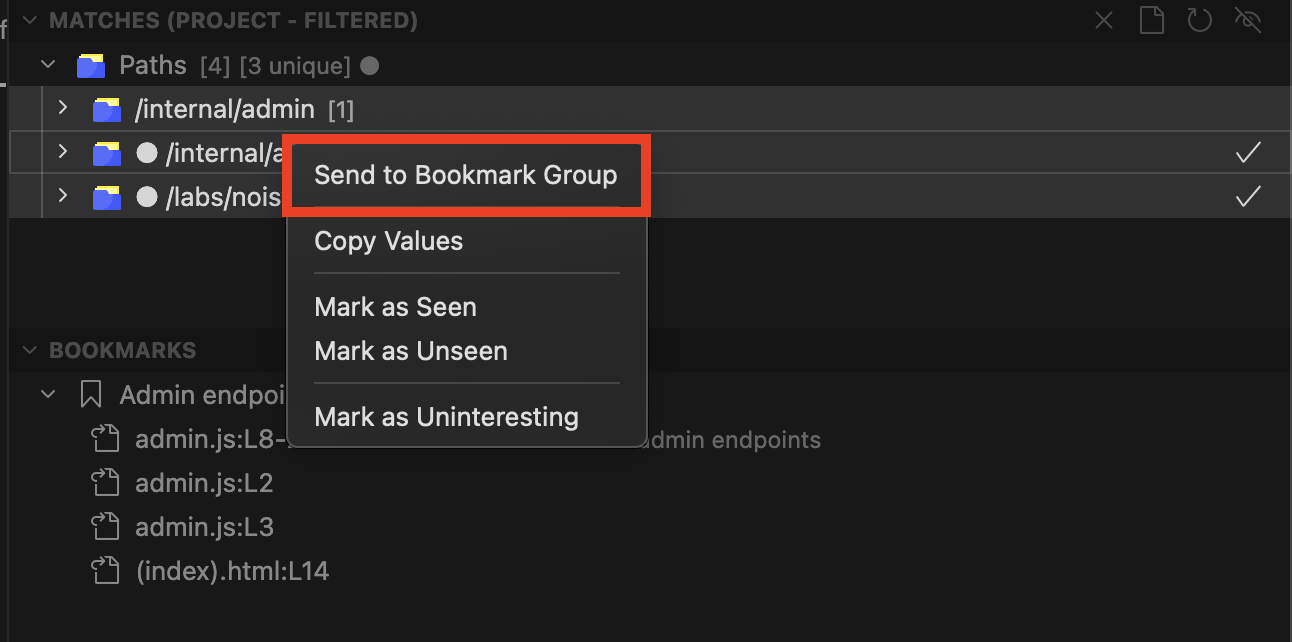
You can also bookmark matches from the Matches view.
Conclusion
In this guide we went through the main capabilities of the VSCode extension and learned about the different capabilities that it offers.