File monitoring
jxscout allows you to configure monitors that check for updates on your targets. In this document we will go over how you can set up your own monitors using jxscout.
Backup and restore
You will usually use jxscout running on your own machine, but for setting up monitoring, you will probably want to run it on a VPS. However, you might want to port your existing project over to your VPS so you don't lose the state of the target as you know it.
Before jumping into monitoring, let's see how you can port over your projects to a VPS. To do this, you can run the following command to create a backup of your project:
$ jxscout-pro-v2 -c backup --project-name <your_project>
This will output a .zip file that you can import across machines (or even on the same machine if you want to change the project's working directory).
To restore the project (e.g. on your VPS), move the backup zip over and restore the project using:
$ jxscout-pro-v2 -c restore --project-name <your_project_new_project> <path_to_zip>.zip
Now that we know how we can move over projects, let's see how we can set up monitoring.
Monitoring mode
To do monitoring, you should run jxscout in monitoring mode. In this mode, jxscout will send you notifications of every update it detects.
jxscout assumes that requests are only being initiated by monitors when running in monitoring mode. It notifies you of every event that occurs in its internal state. So if you are running this locally it's recommended to start jxscout in monitoring mode using a different port than the one you use by default by passing --proxy-port <other_port> at startup, to avoid getting hammered with notifications.
To start jxscout in monitoring mode, simply pass --monitoring when running it:
$ jxscout-pro-v2 --monitoring
When you load the project you want to monitor for the first time, you will notice this warning:
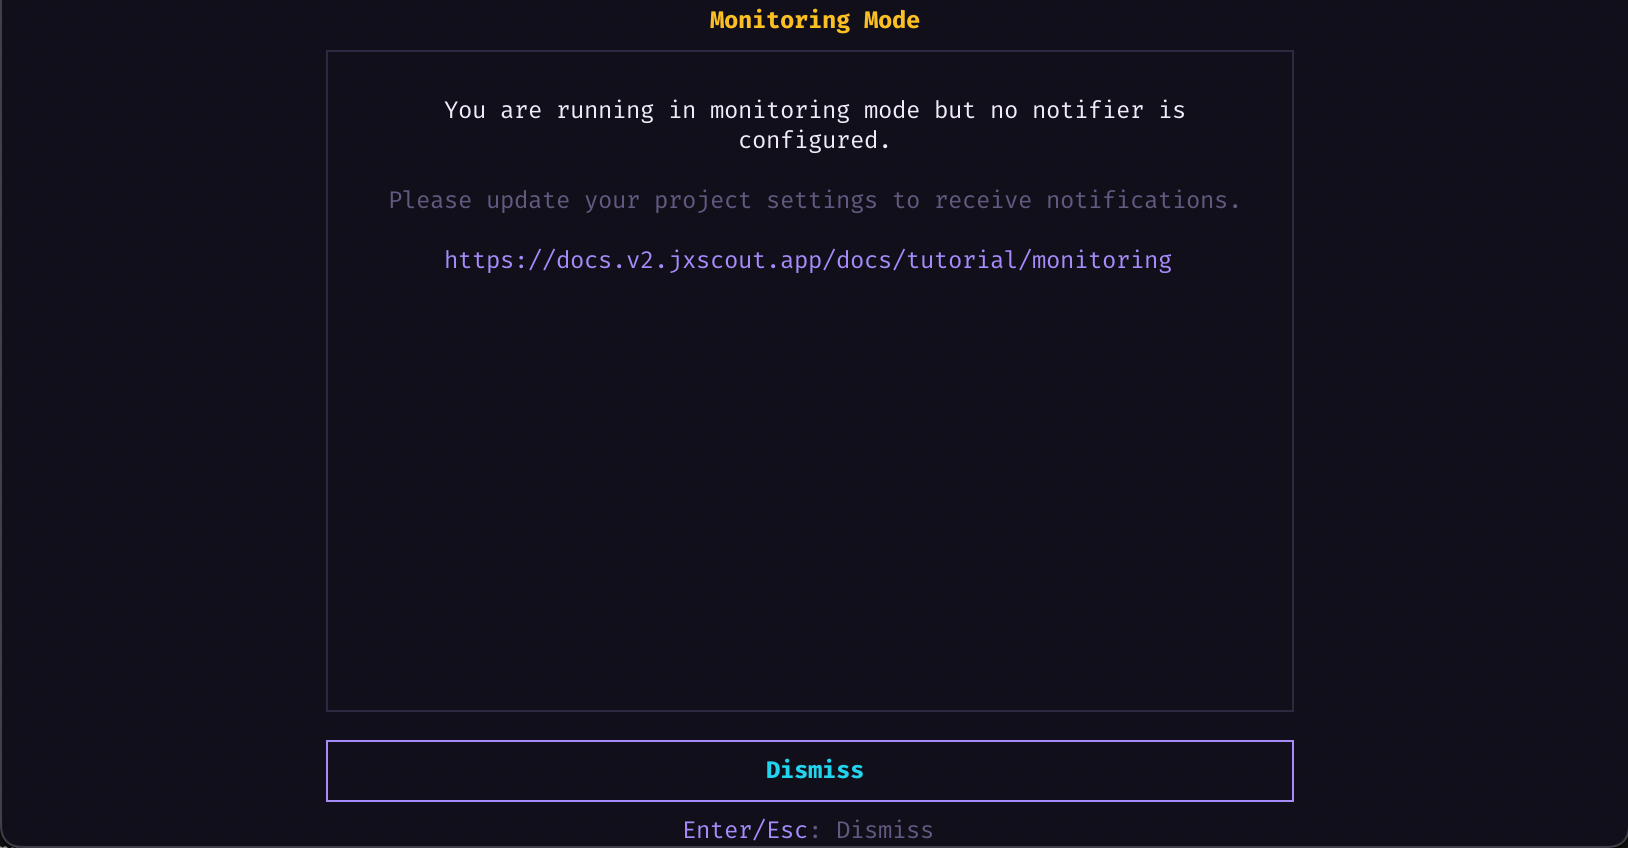
This means that you haven't configured a way for jxscout to notify you. Right now, only Discord Webhooks are supported.
To configure the notifier, open your project settings (go to the Settings screen to see where your project's settings file is), and add your Discord channel webhook:
// project's settings.jsonc
{
  // ...
  "monitoring_notifier": {
    "discord_webhook_url": "<your_discord_webhook_url>"
  }
}
Save your settings file and you should be good to go. To test out that the webhook URL is working correctly, use the following command:
$ jxscout-pro-v2 -c monitor send-test-notifications --project-name monitoring
If it's working correctly, you should receive some mock notifications from jxscout. Let's now see how we can create a monitor.
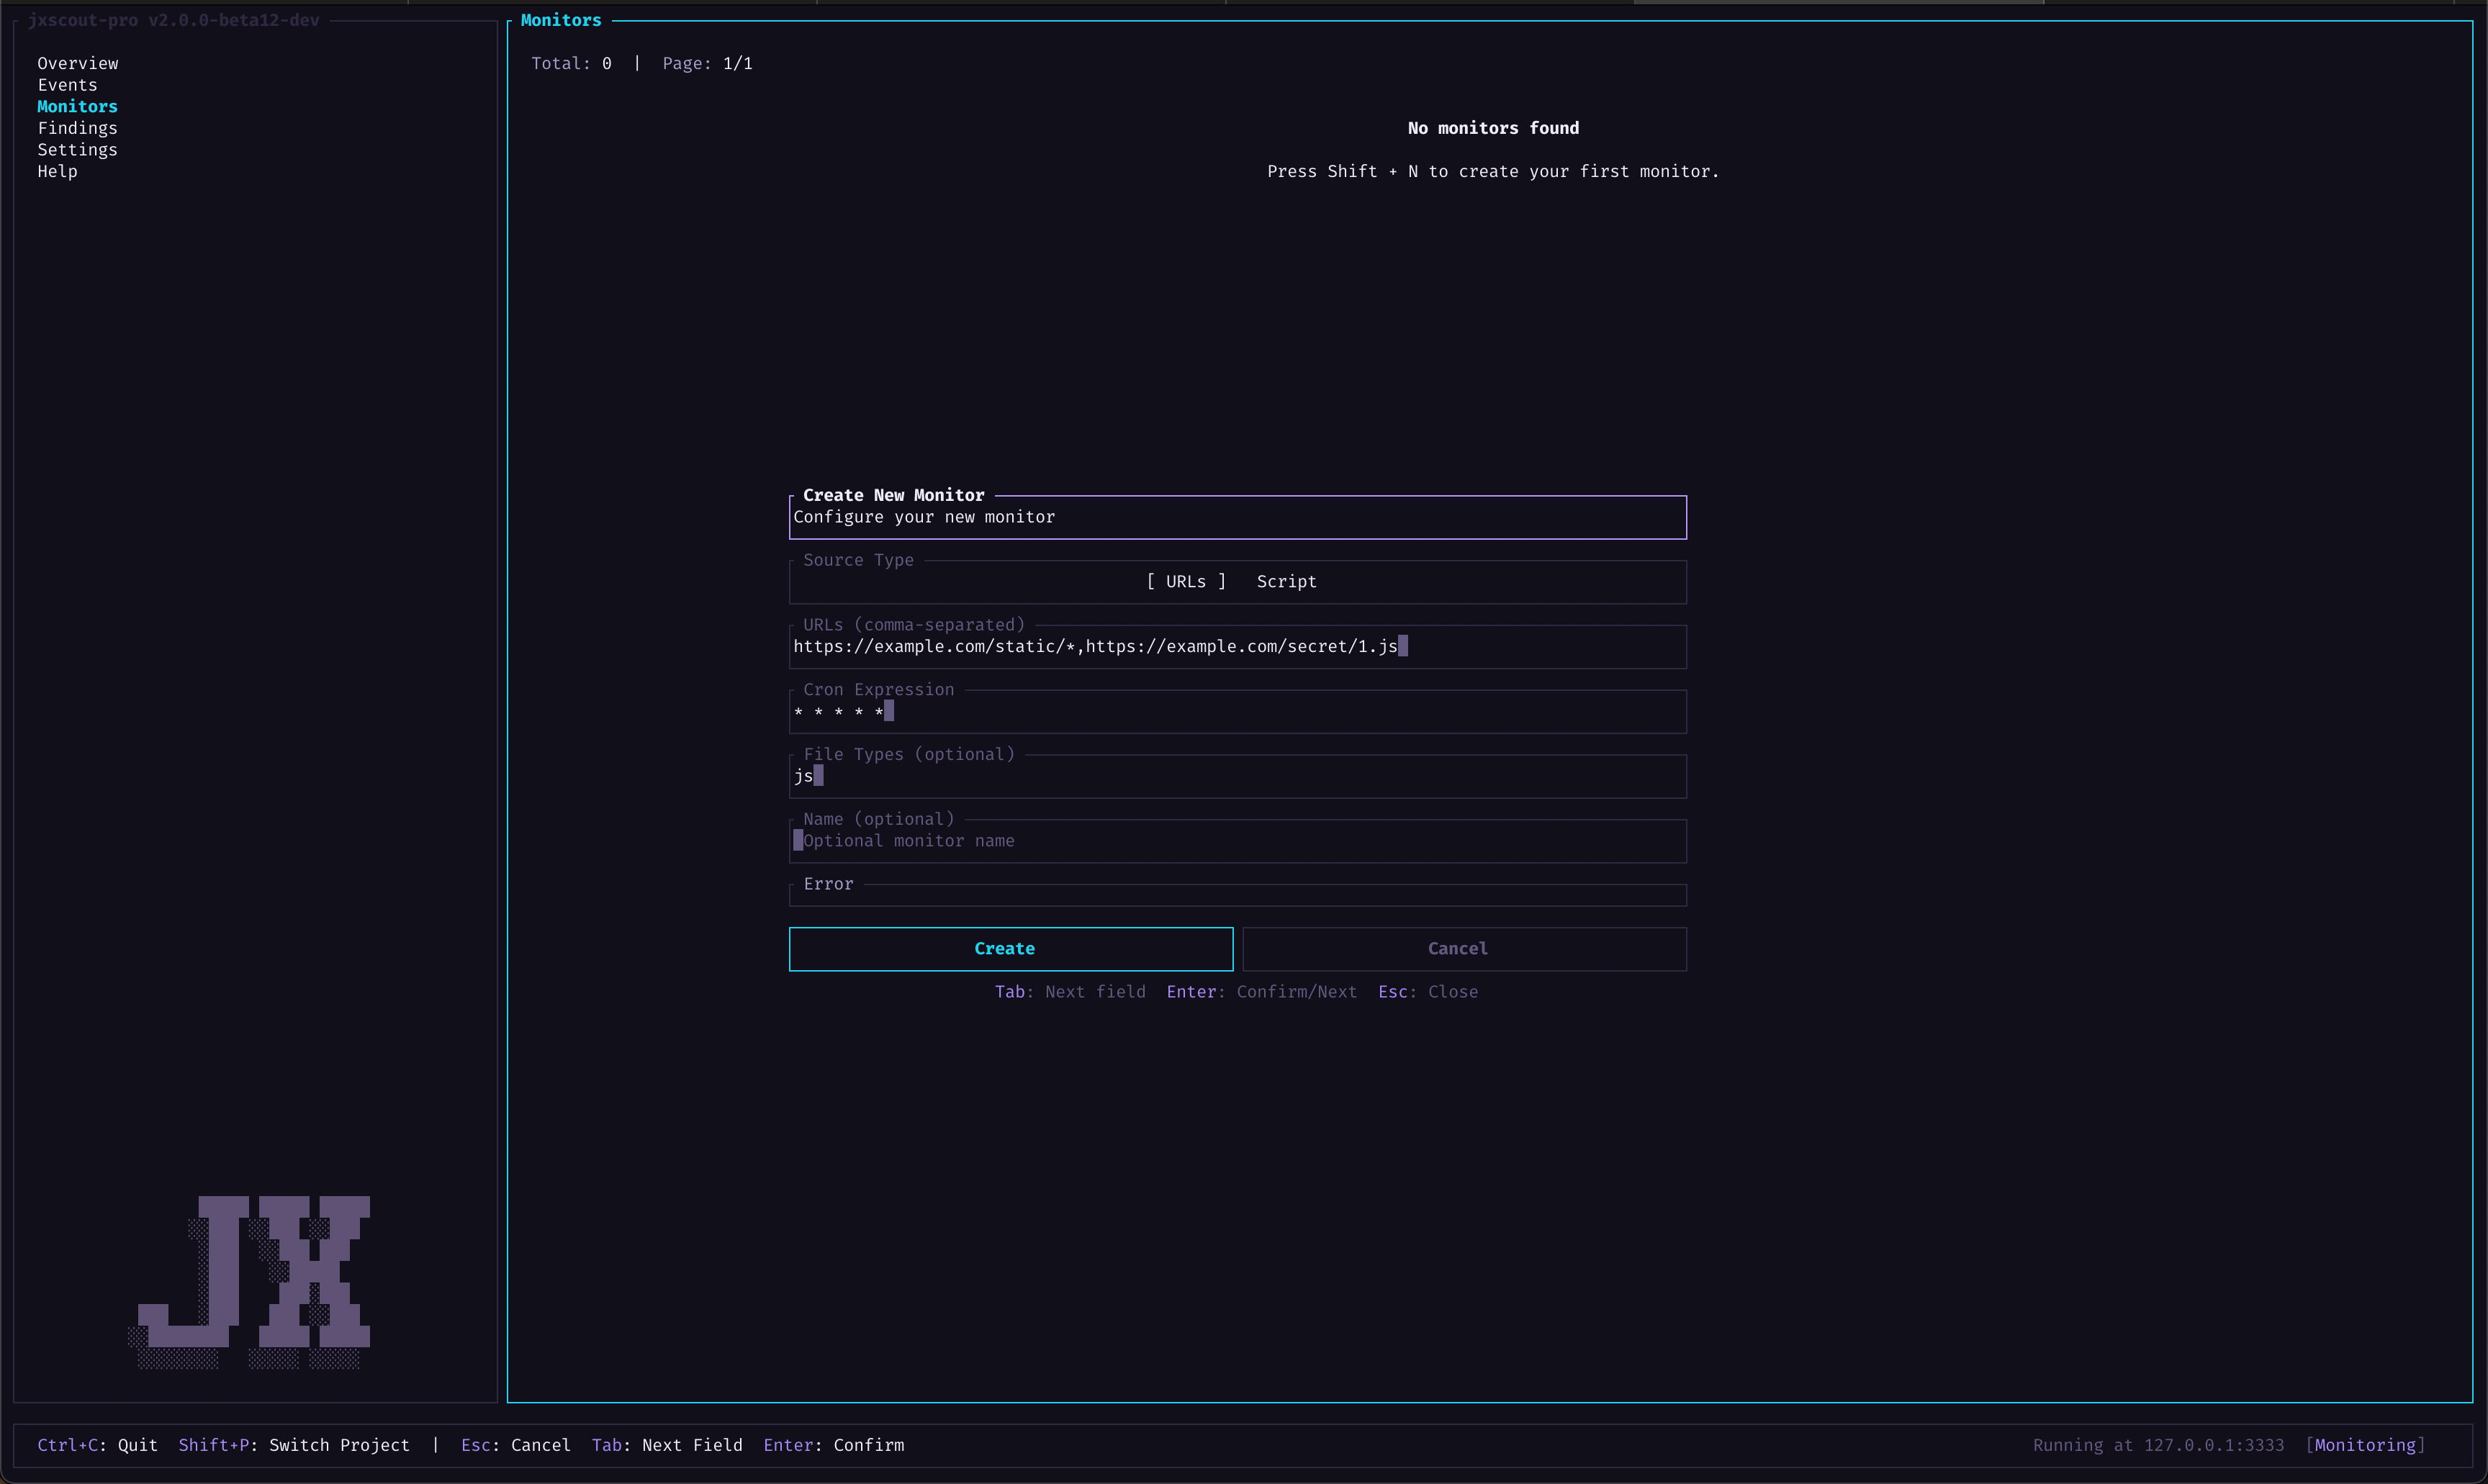
Setting up a file monitor
To set up a monitor, you can go to the monitoring screen and press Shift+N to create one. As an alternative, you can also use the jxscout-pro-v2 -c monitor create --help command to set up a monitor.
URL monitoring
For simple use cases, you can create monitors for URLs. These are monitors that assume that no authentication is required in order to monitor the given files, and request them periodically.
If jxscout detects any changes, it will notify you.
When creating URL monitors, you can either pass full URLs to monitor or pass URLs with * wildcards if you want to match many files in a path tracked by jxscout.
For example, if your project is already tracking:
- https://example.com/static/1.js
- https://example.com/static/2.js
- https://example.com/static/about.html
- https://example.com/secret/1.js
The following monitor would track:
(You can also pass URLs to HTML pages, this is just an example of how you can filter by file type using the * wildcard).
After you create your monitor, just keep jxscout running and it will notify you of any updates according to the cron expression you defined.
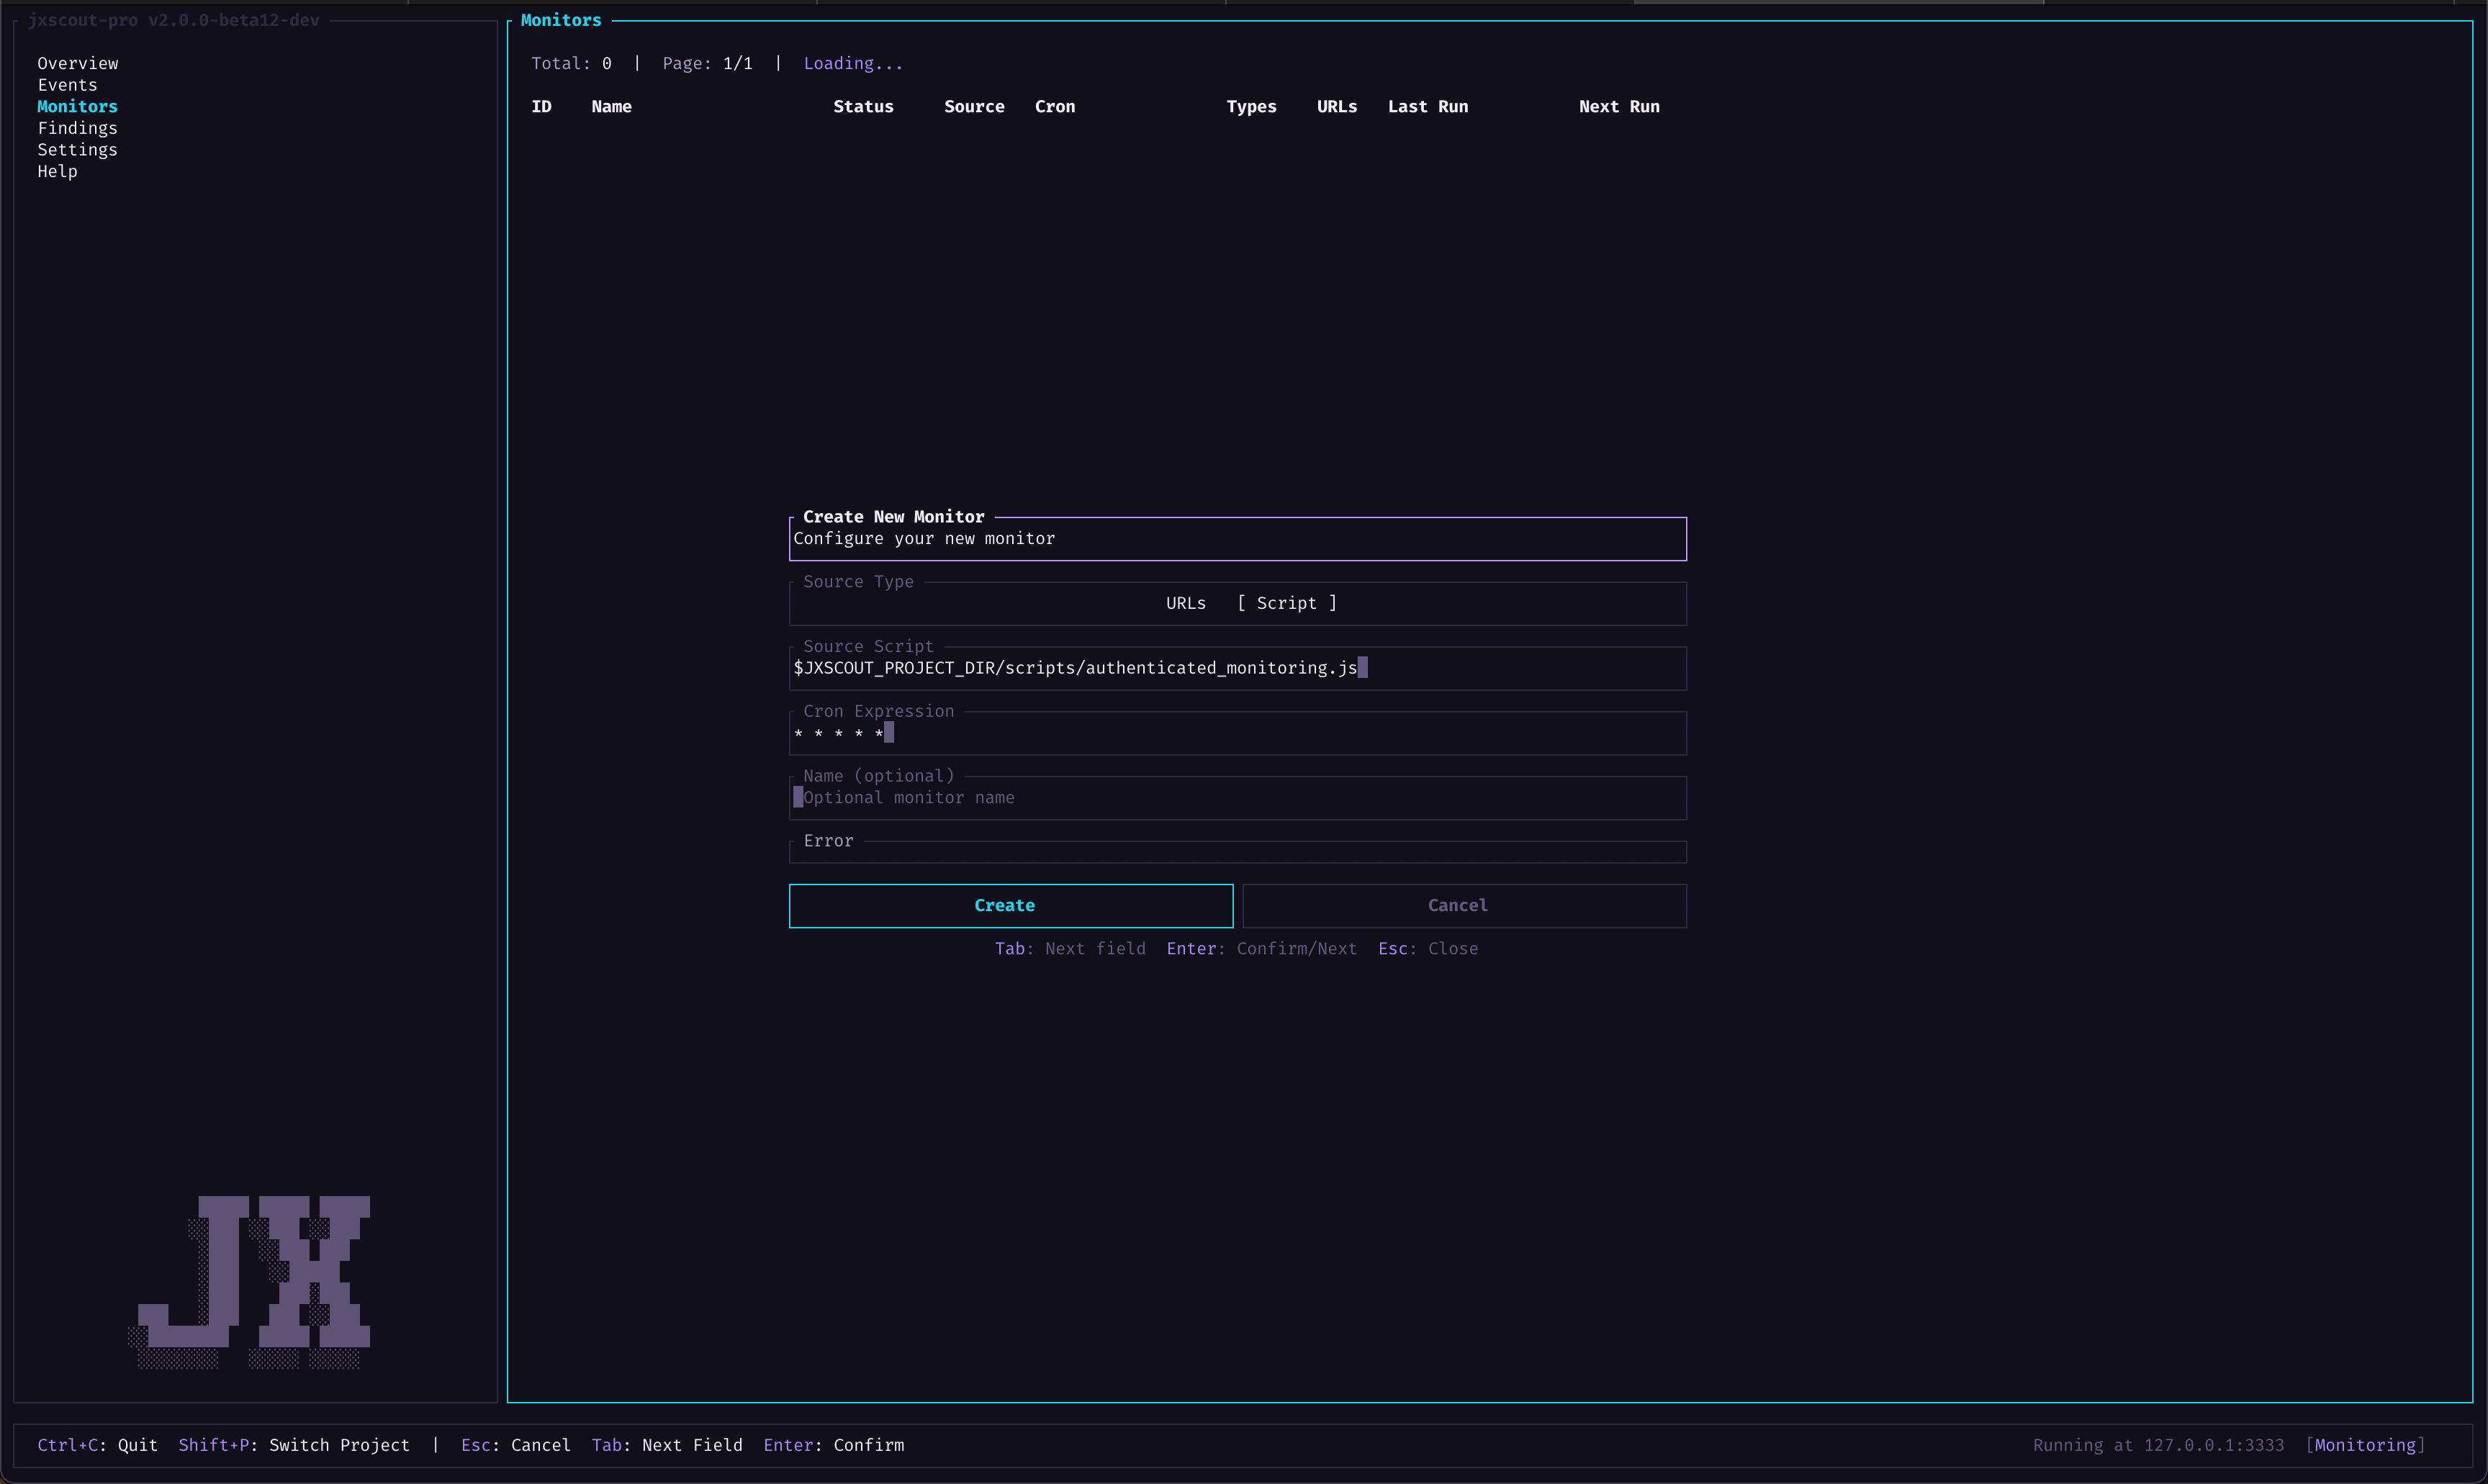
Script based monitoring
URL monitoring is great for publicly accessible assets, but if you want to have robust monitoring on authenticated pages, you can also define your own script that jxscout will call periodically.
In your script, you can use a headless browser and proxy traffic through jxscout. That way you will be alerted if new files were added to your target's JS bundle too, since it will load just like a browser.
The following payload is passed to your script as stdin:
{ "proxy_host": "<jxscout_host>", "proxy_port": "<jxscout_port>" }
Configuring notifications
The following notification settings are enabled by default, but you can configure them to your liking:
// project's settings.jsonc
{
  // ...
  "monitoring_notifier": {
    "discord_webhook_url": "<your_discord_webhook_url>",
    "notify_js_file_updates": true,
    "notify_new_js_files": true,
    "notify_new_js_matches": true,
    "notify_request_failures": true,
    "notify_html_file_updates": false,
    "notify_new_html_matches": false
  }
}